
Getting Started with 3D Printing

In May 2019, I bought a 3D printer and getting into this technology was surely one of the most fascinating learning experiences of my life. In this post, I would like to share some of my knowledge with you.
My first contact with 3D printing was with an Ultimaker 3 that we used to have at work. I had bought a digital 3D model that I really wanted to have printed and was able to realize my first 3D printing project with the help of a colleague. I was super amazed by the manufacturing possibilities.
Unfortunately, some time afterwards, the printer at my workplace got stolen and couldn't be replaced. So, when I heard about a cheap offer for a Creality Ender-3, I couldn't resist any longer and I bought it for less than 160€, which I still find astonishingly little money for such a machine.
When it arrived, I eagerly assembled it and started my first prints. Since then, I had a lot of failures, many epiphanies and several times an amazing sense of achievement when something that I designed suddenly materialized before my eyes.
3D printing is absolutely genius in opinion, but it also has quite a few pitfalls. I will try to summarize my learning process and maybe help you avoid some of those pitfalls.
The 3D Printing Workflow
For 3D printing, you need access to a 3D printer. But a printer alone is not enough. Generally, the workflow looks something like this:
Acquiring a 3D model (design one yourself or download it somewhere)
Preparing the model for printing (repairing issues, making it fit the printer, adding supports)
Slicing the model
Printing
Post-processing (like sanding and painting)
As you can see, the process is not too complicated, but there is still some knowledge required for each step. In the remainder of this post, I would like to have a look at each of the steps.
The 3D Printer
There are different kinds of 3D printers. And the kind of 3D printer heavily influences all steps of the workflow. Not every printer is suitable for every 3D printing job.
If you don't want to directly go and buy your own 3D printer, I suggest looking for a makerspace, where there is often printers available for public use; or check if someone you know already owns such a device.
FDM Printers
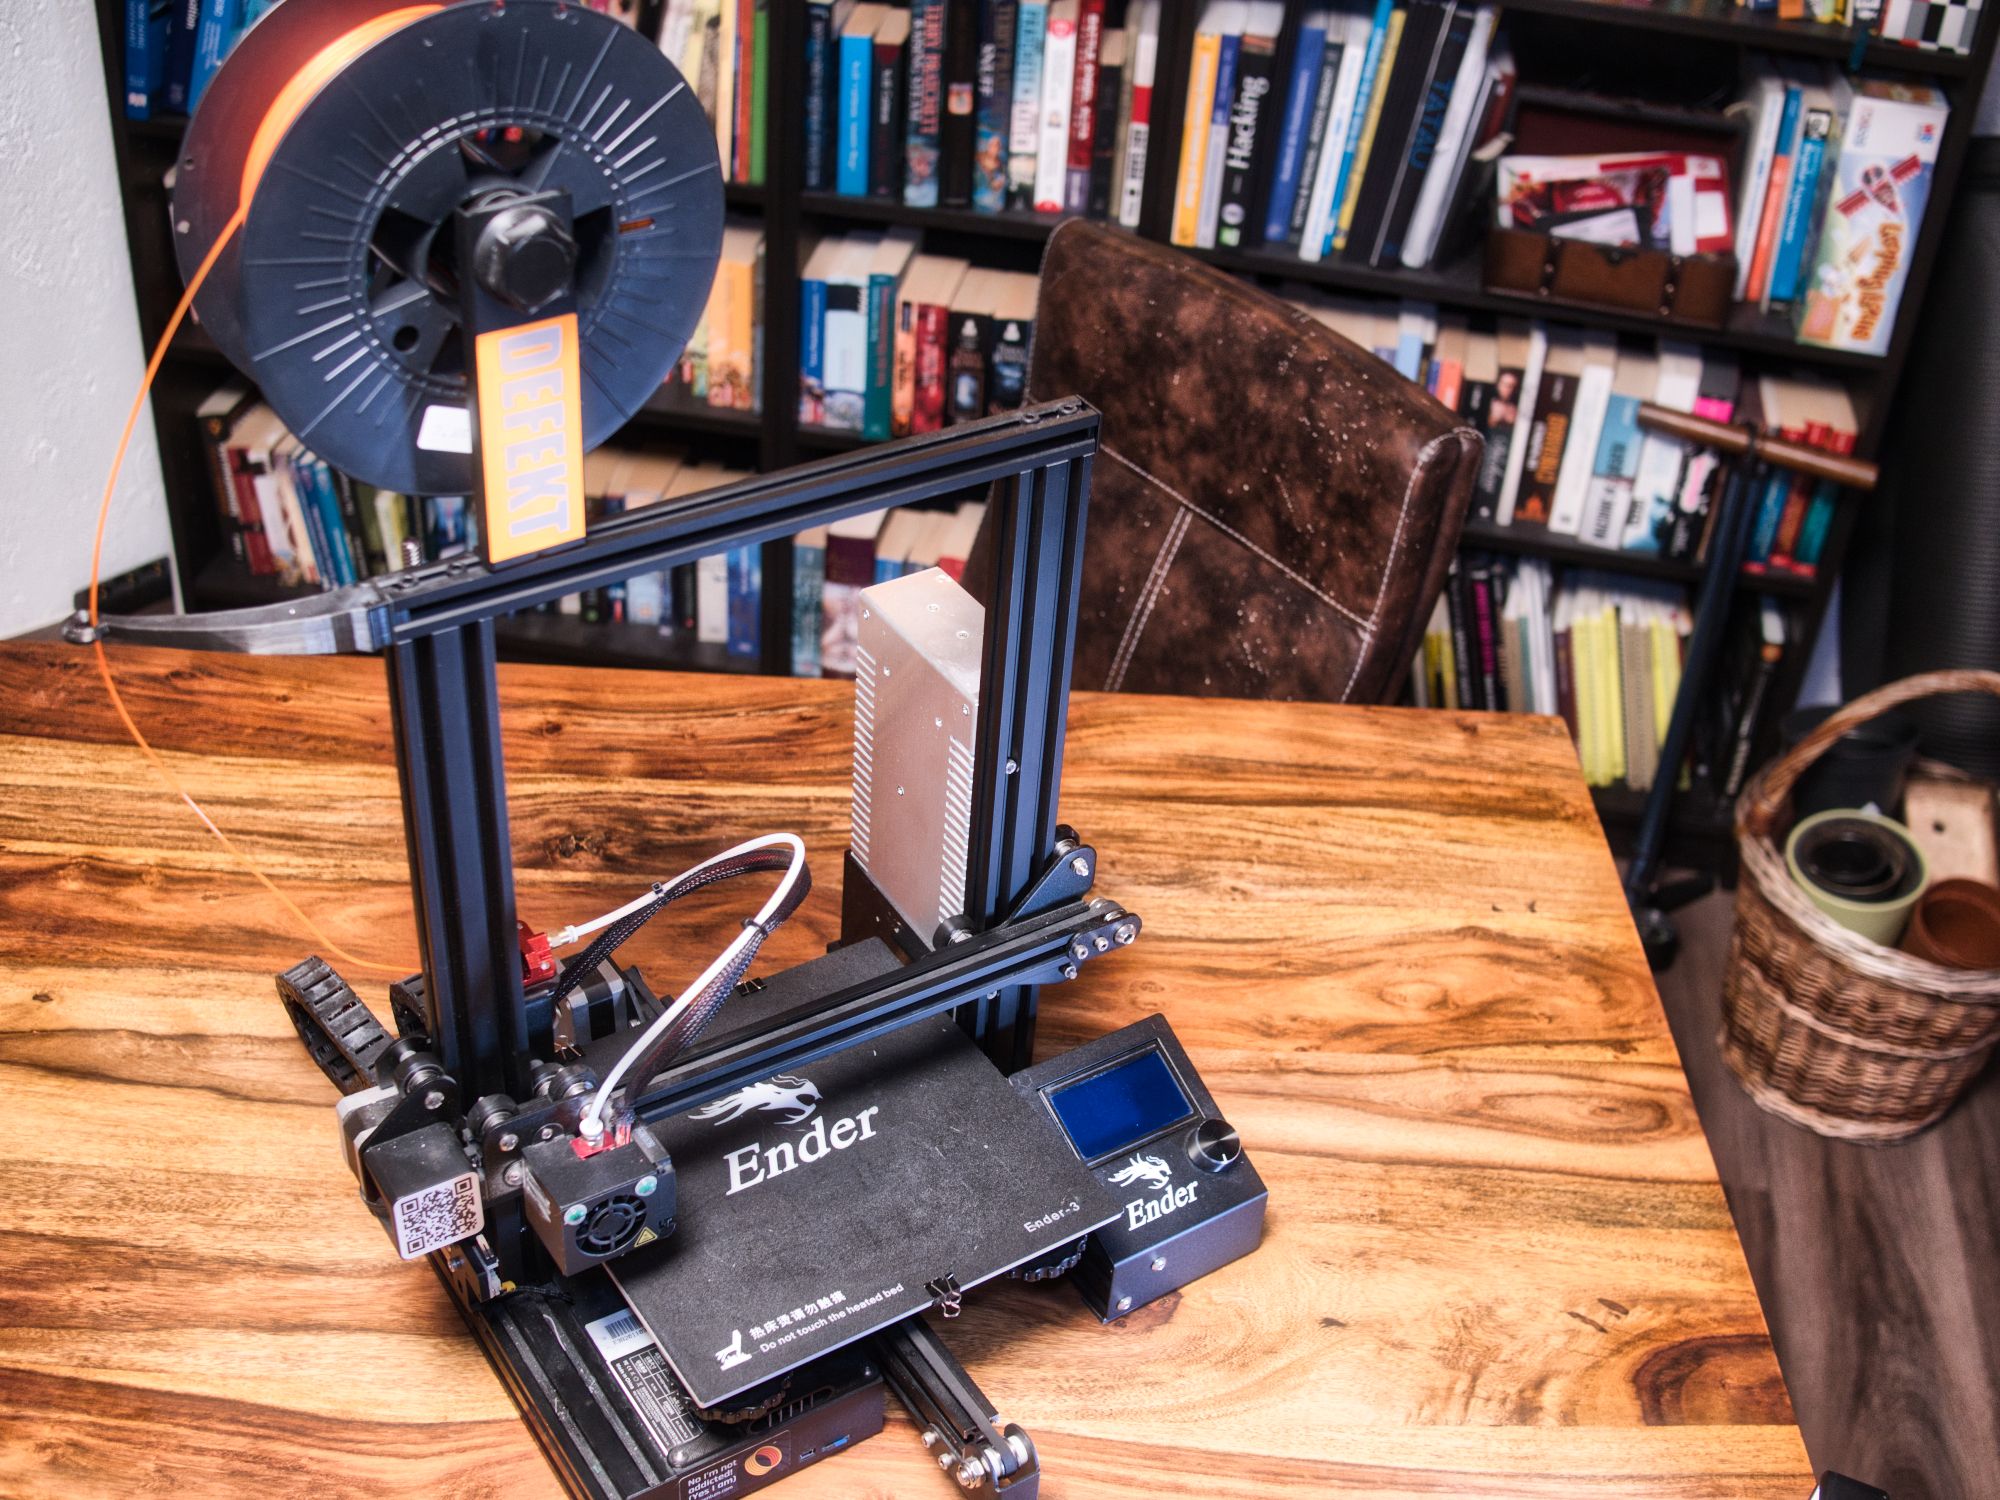
FDM (fused deposition modeling) or FFF (fused filament fabrication) printers are the most accessible 3D printers. There are machines that are quite cheap (starting from a little over 100€), the material is easy to get, store and process, and they require little maintenance. I see FDM printers as the ideal entry point into the world of 3D printing.
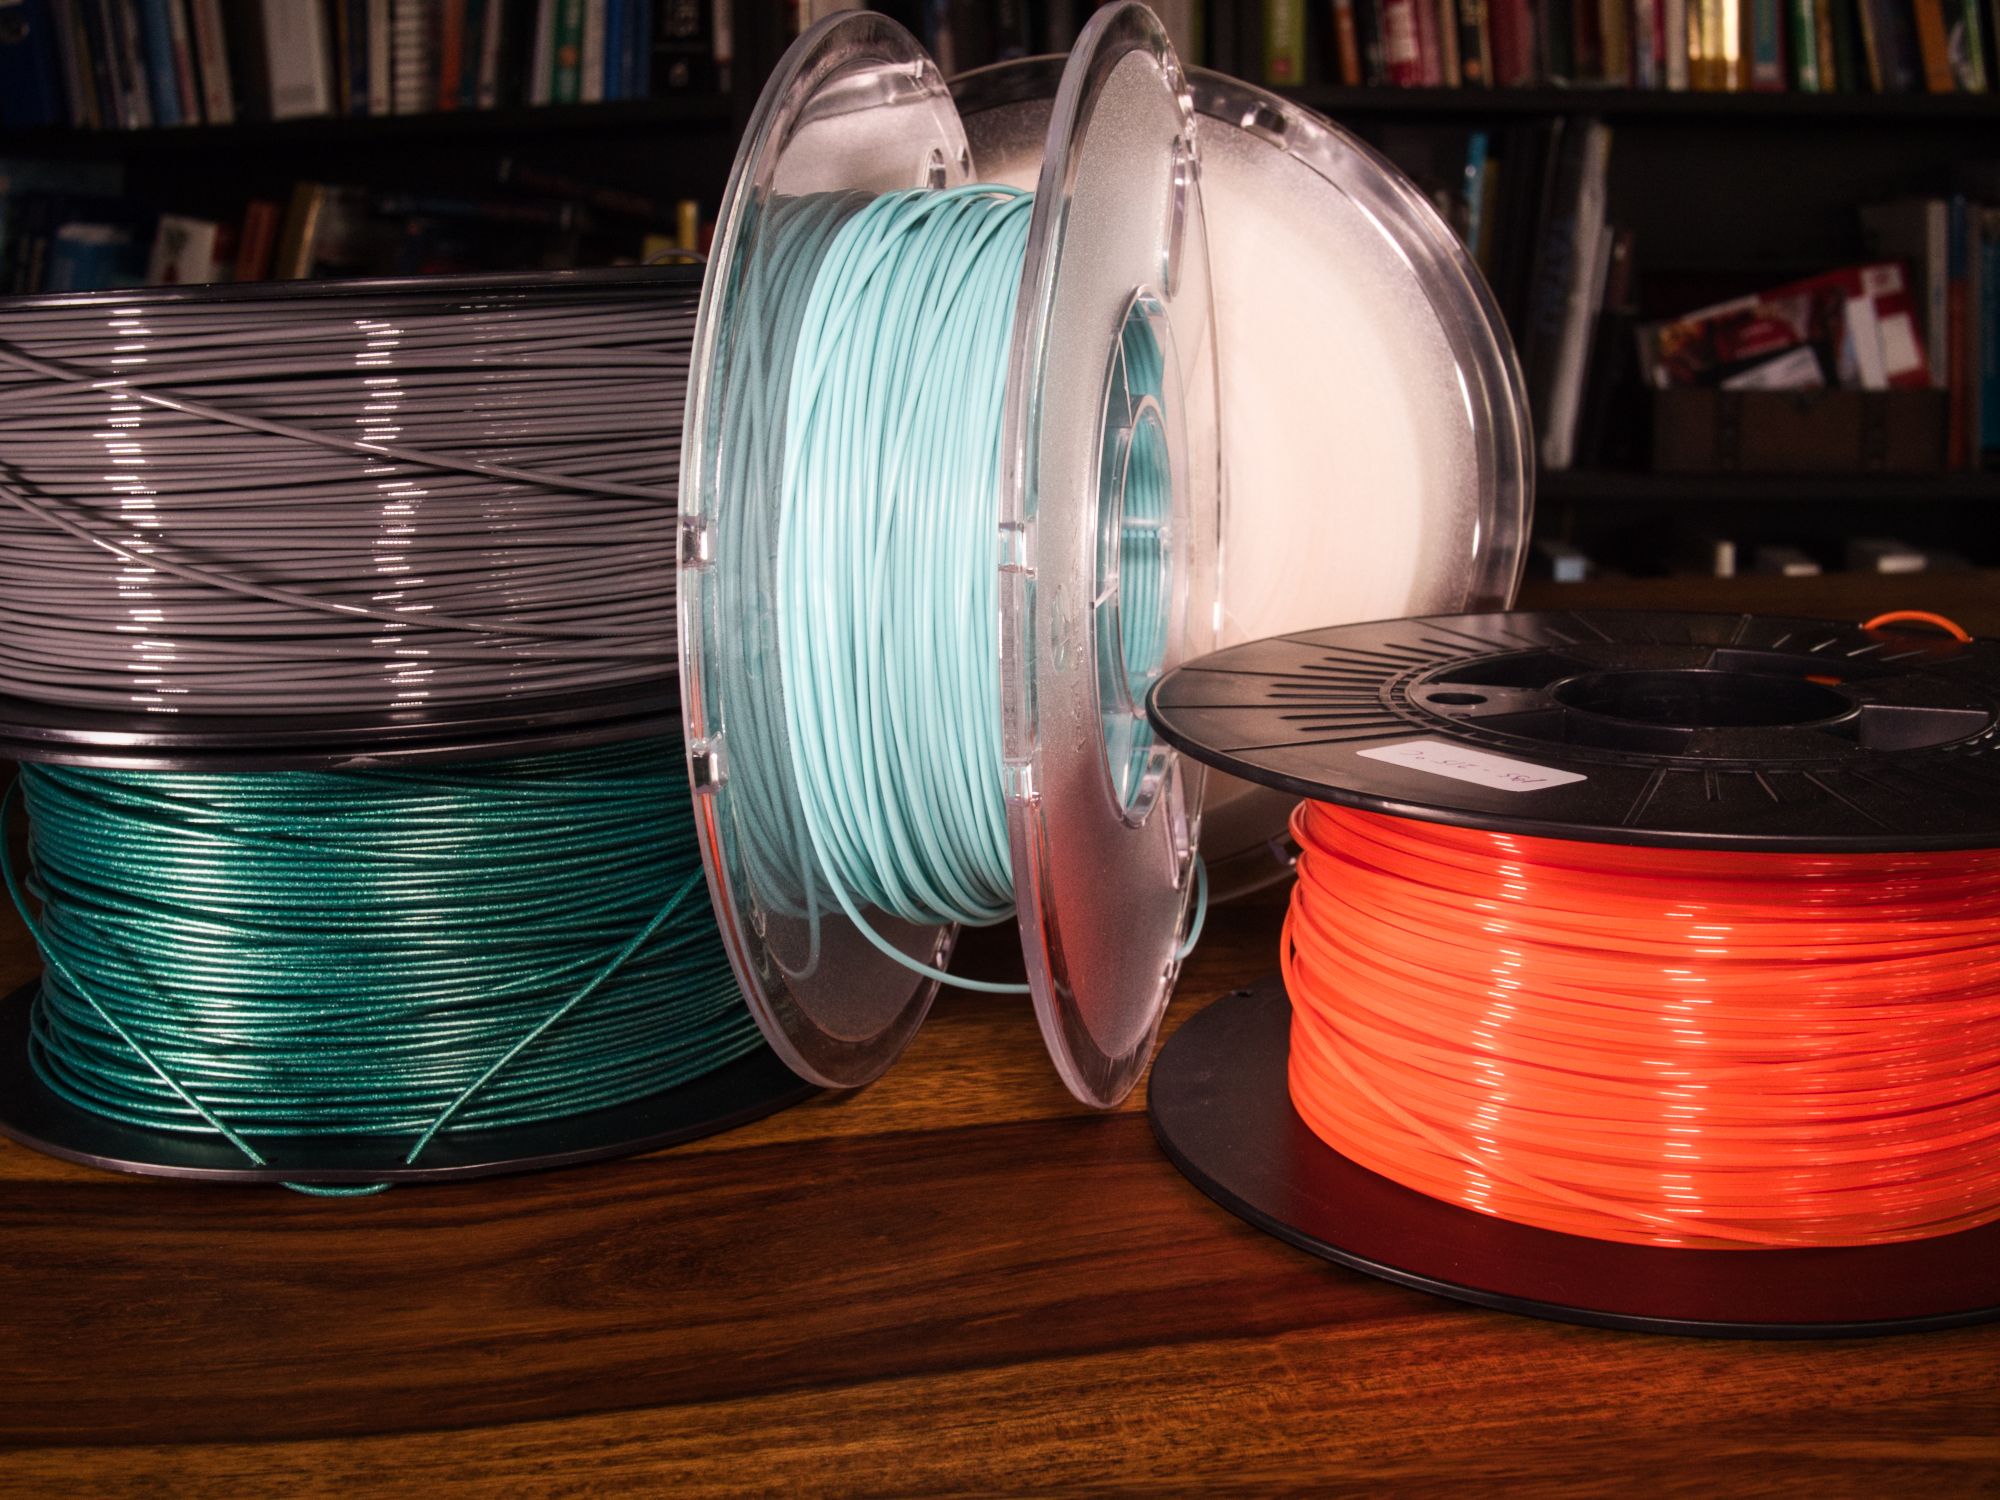
FDM printers use filaments, which are most often some kind of plastic. Filaments come on spools of various sizes (from about 250g to about 8kg) and in many different colors and characteristics.
ABS and PLA are the most popular materials for FDM printing. ABS is stronger and has better heat resistance, but is also more difficult to print. So far, I have only used PLA for my 3D prints and I am very happy with it. There are also many variants, such as PLA with added steel, carbon or wood, which give the materials unique characteristics and looks.
An FDM printer has a nozzle that heats up, can move in 3 dimensions and melts the filament that is fed into it. The melted plastic is then extruded through the nozzle, essentially producing a very thin plastic sausage, that is used to form the 3D model.
In almost all cases, an FDM printer prints in layers with typical layer heights from about 0.01 mm to about 0.5 mm.
SLA Printers
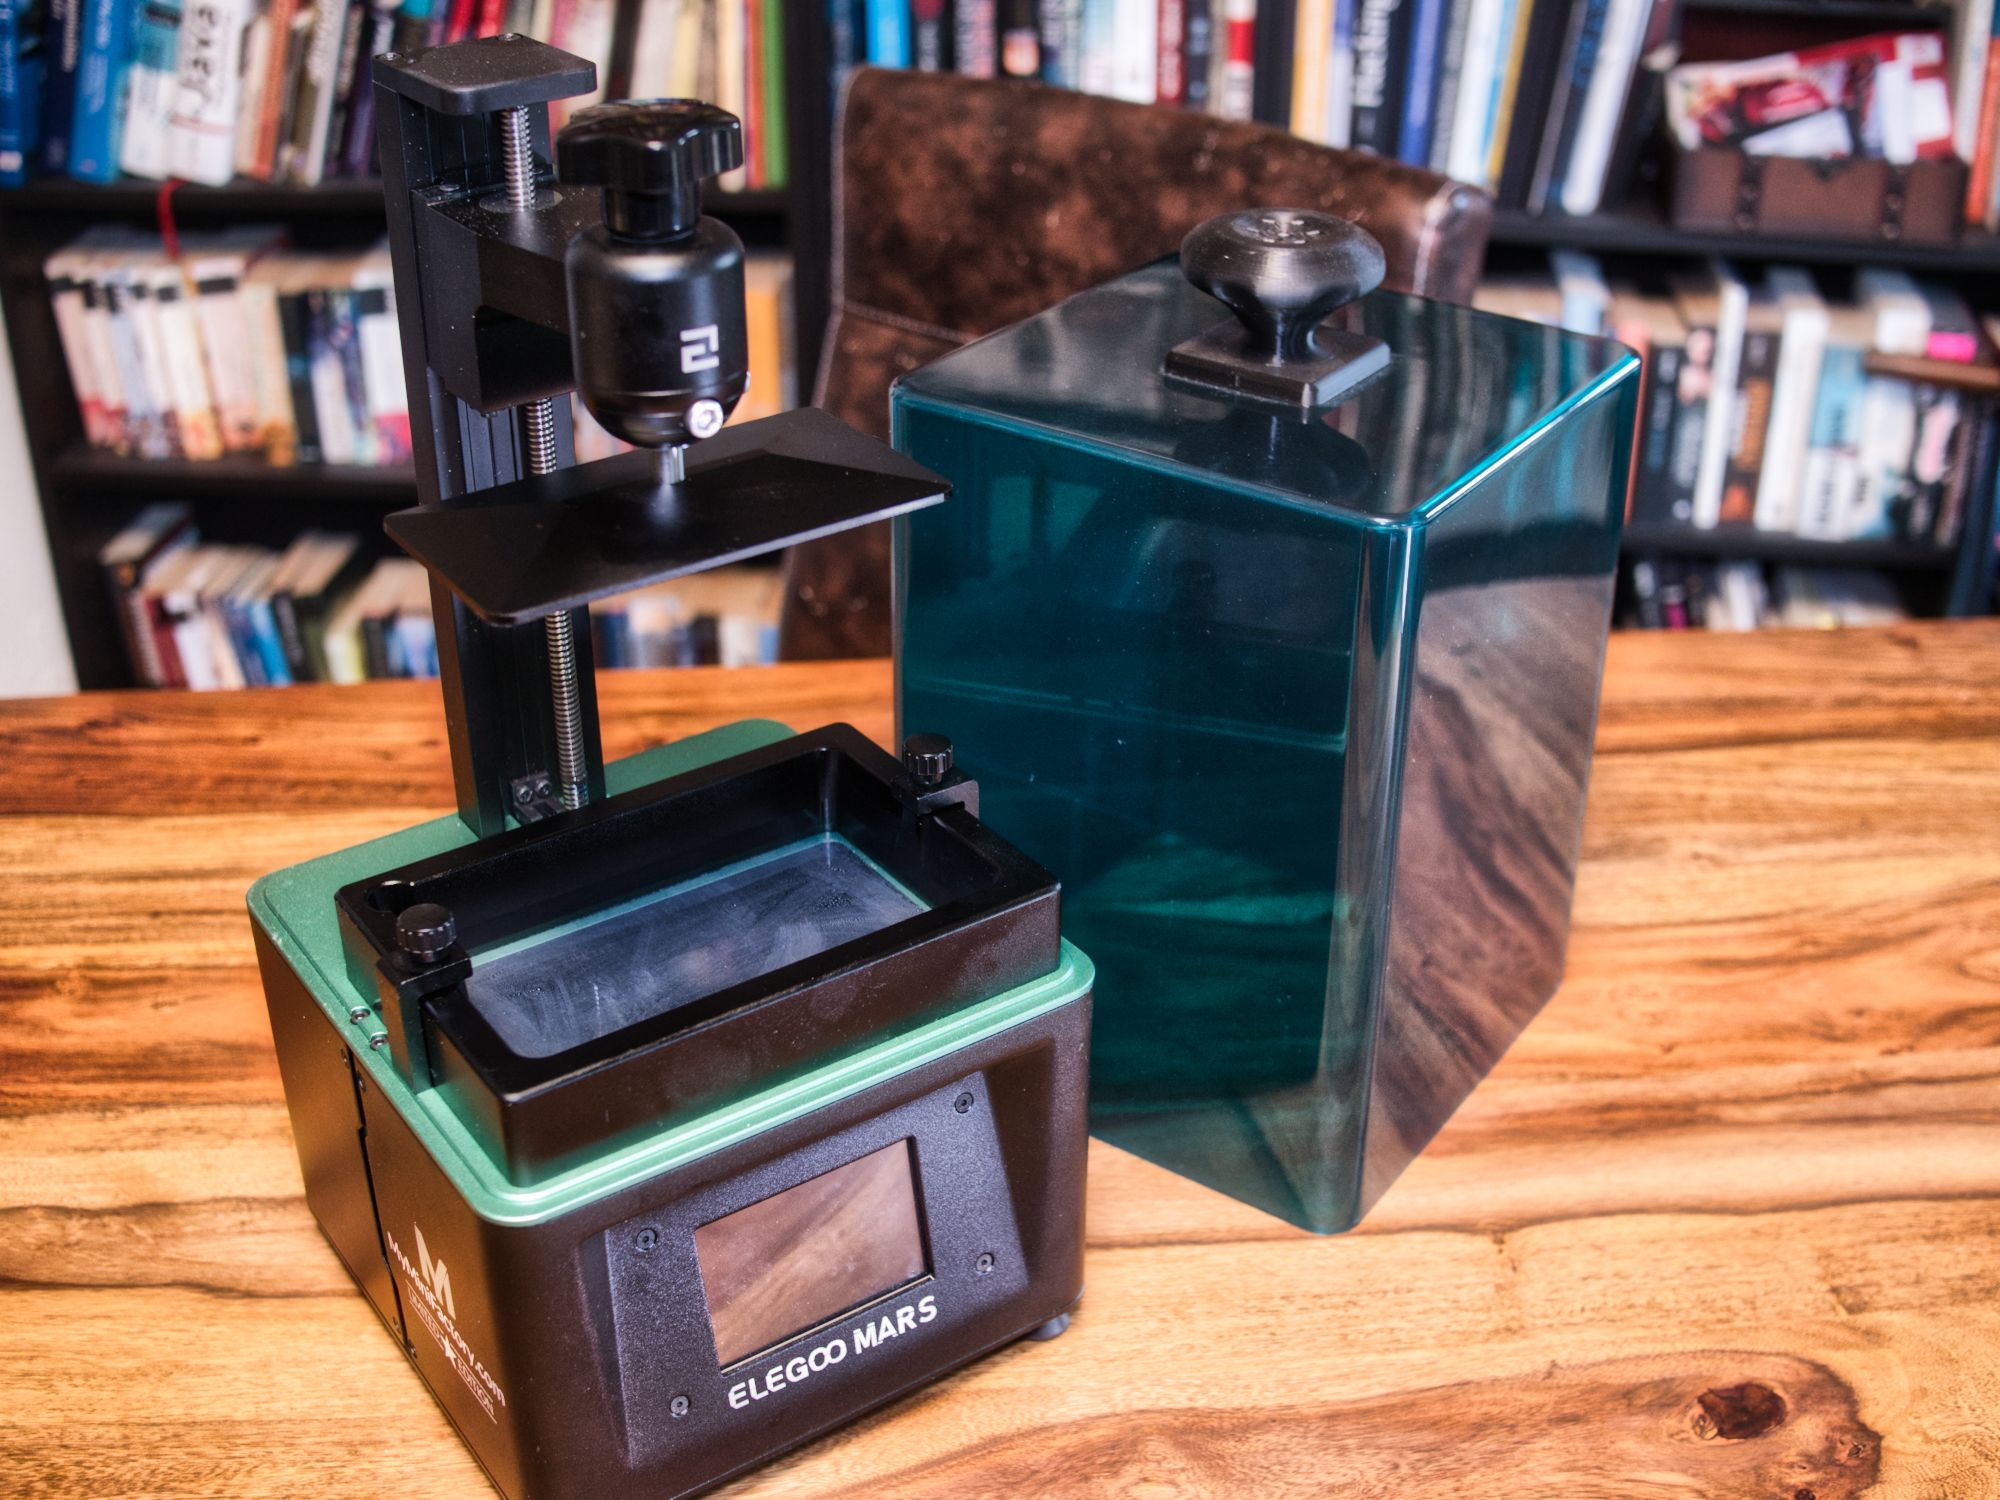
SLA (stereolithography) printers build 3D models by making use of chemical processes that solidify liquid resins. A UV light source like a laser or UV display is used to harden layer by layer of the 3D model.
Nowadays, SLA printers are available starting at around 160€, although most practical options will probably be about twice that price.
SLA printers generally are able to produce 3D prints with much finer details than FDM printers. However, the liquid resin is more complicated in its handling. In it's liquid form, most resins are toxic to living organisms and thus require protective measures such as nitrile gloves, protective goggles and breathing mask. Special care is required when disposing of unused resin and cleaning is not as straightforward as with FDM printers. Also, you will require a lot of paper tissues, filters for the resin, as well as isopropyl for cleaning.
Commodity SLA printers also mostly have a much smaller possible print volume than FDM printers. That's probably not the worst thing as resin is often also a bit more expensive than filament.
On the other hand the resolution of SLA printers is really great and if you require highly detailed prints, this may be the technology for you. SLA printers are very popular with tabletop role-playing gamers for that reason, as it's possible to print highly detailed figurines.
Other 3D Printer Types
Most other types of 3D printers are not as accessible, because they are either quite expensive or difficult to work with, or both.
SLS (selective laser sintering) uses a laser to create the 3D model out of powder. Since the powder supports the print, it is possible to print objects that would otherwise require additional support material or even not be printable at all.
The cheapest SLS printers start at around 5000€, so this is more on the expensive side.
Getting a 3D Model
The quickest way to acquire a 3D model that can be printed is to download it. There are numerous places in the web where you can find free 3D models or models for purchase. A very popular one is Thingiverse, where you can find a very large number of free models. Most often this is my go-to place for finding models, but there are also other sites like MyMiniFactory that focuses a bit more on figurines and also has payed models in addition to a lot of free ones.
I liked this video, which lists 10 sources for free 3D models.
Many different formats for 3D models exist. But STL (stereolithography) is more or less the standard for exchanging models and this is also that format that you will most likely get when downloading a model.
Of course you can also create a model yourself. This is out of scope for this post, but I highly encourage you to try it out, as creating something that you can later print and hold in your hands is an absolutely awesome feeling.
Preparing the Model for Printing
3D printers usually aren't very smart. If you just gave them an STL file, they wouldn't know what to do with it. That's because the STL describes the model as a series of points and faces. But a 3D printer expects commands that tell it how to move it's multiple motors and how much heat to apply.
This is where another software comes into play: the slicer. Popular examples include PrusaSlicer and Cura. On the left you can see Cura and on the right there is PrusaSlicer. I personally prefer PrusaSlicer, but I think Cura might be a bit easier in the beginning.
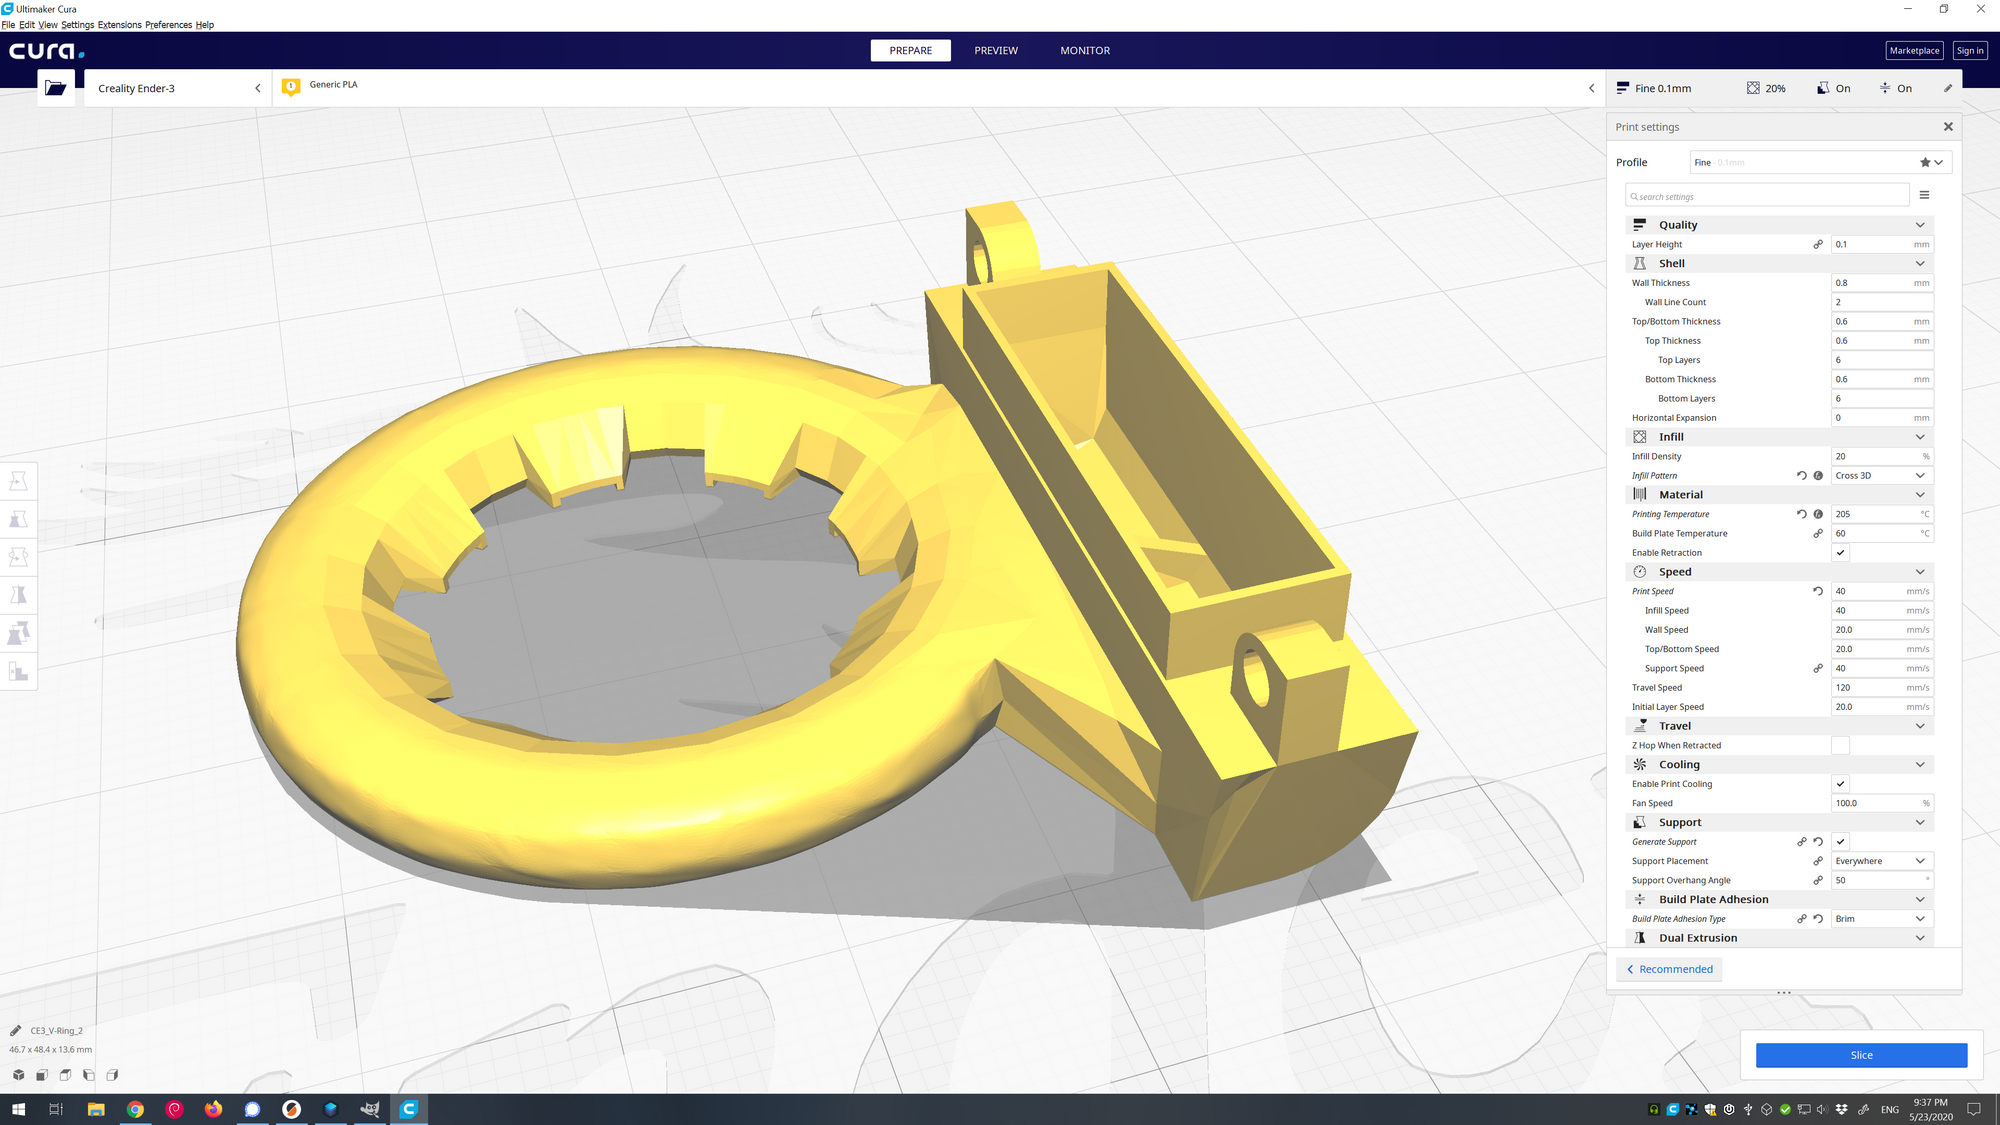
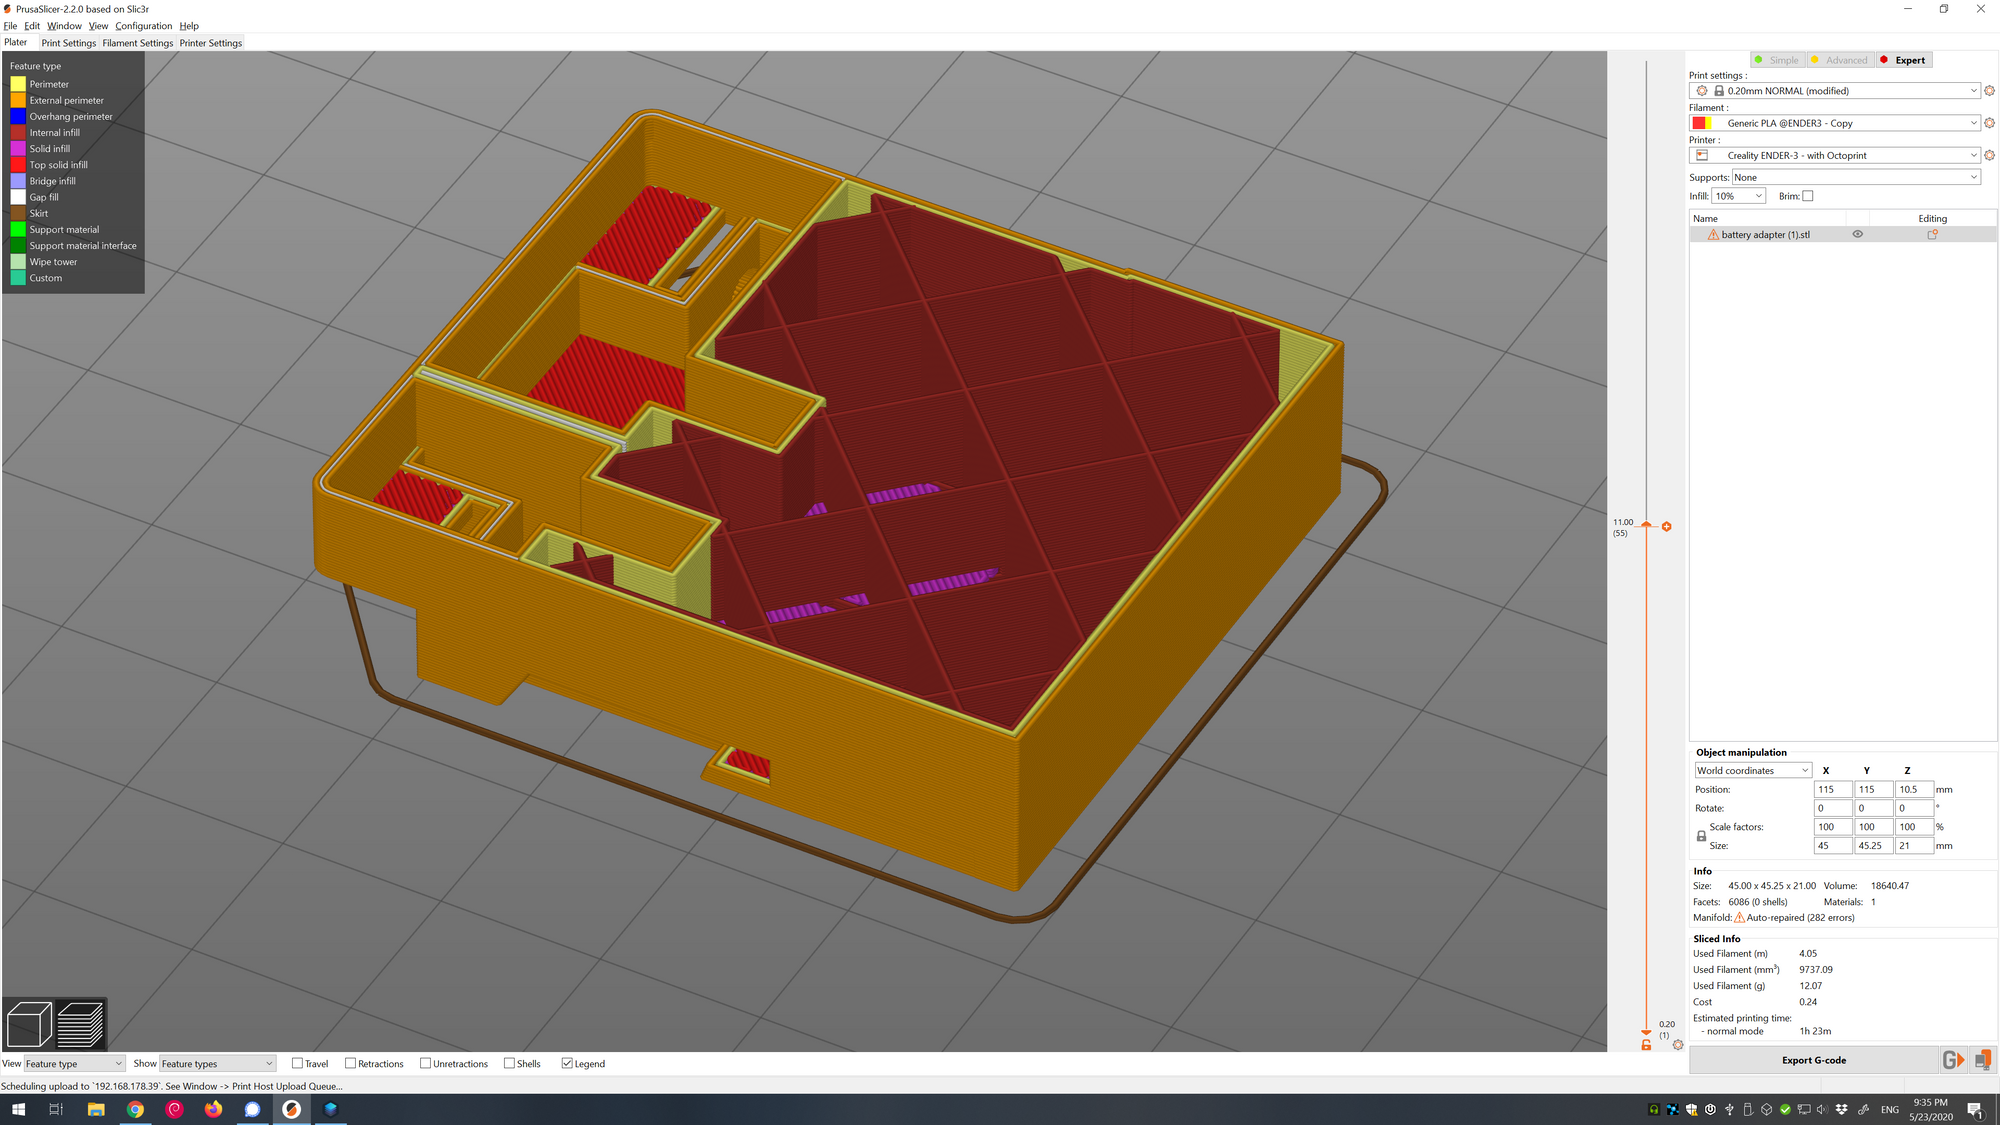
A slicing software allows you to do some simple modifications of your model, such as resizing or rotating it. It may even be possible to cut the model or slightly alter it, depending on your slicer.
But most importantly, the slicing software generates code that the printer can understand. It slices the model into layers that can be printed by the printer and also adds support material for overhang portions of your model that wouldn't normally print. You will have to set some parameters, such as how thick the individual layers should be. In the beginning it's a good idea to look for a slicer that already includes default values for your printer, so you won't have to figure out how to set dozen or even hundreds of settings.
But you should at least check if the temperature settings fit your filament. If you want to get more involved an tweak your settings, it's worth searching for good parameters for your printer on the web.
Preparing the Printer for Printing
Now you really want to start printing. But wait! First you should make sure that it is set up correctly. Of course it should be assembled according to the manual (or maybe look for an assembly video online as these often contain valuable hints; for the Ender 3, I really liked this video).
Another extremely important step is to level your print bed. It is crucial that within one layer, the nozzle has the same distance to the print bed in all positions. Otherwise your model may fail because it doesn't stick to the plate, or no filament comes out, because there is no space for it. In the worst case you may even damage the printer if the print head runs into the bed too harshly.
Printing
Now you can actually print your model (don't forget to insert some filament). Depending on the actual model, printing can take quite a while; up to many hours or even days. But especially in the beginning, you should keep an eye on your printer, so it won't do anything bad (like catch fire).
If your first models don't come out as expected, don't be discouraged! It is absolutely normal that it will take several iterations until everything works flawlessly. You will probably keep improving your workflow for many years after your first 3D print. Just keep looking for information on how make things better. Possible adjustments include different materials, temperatures, movement speed, extrusion speed, slicing settings, slicing software, print bed material, printer upgrades, ... and countless more.
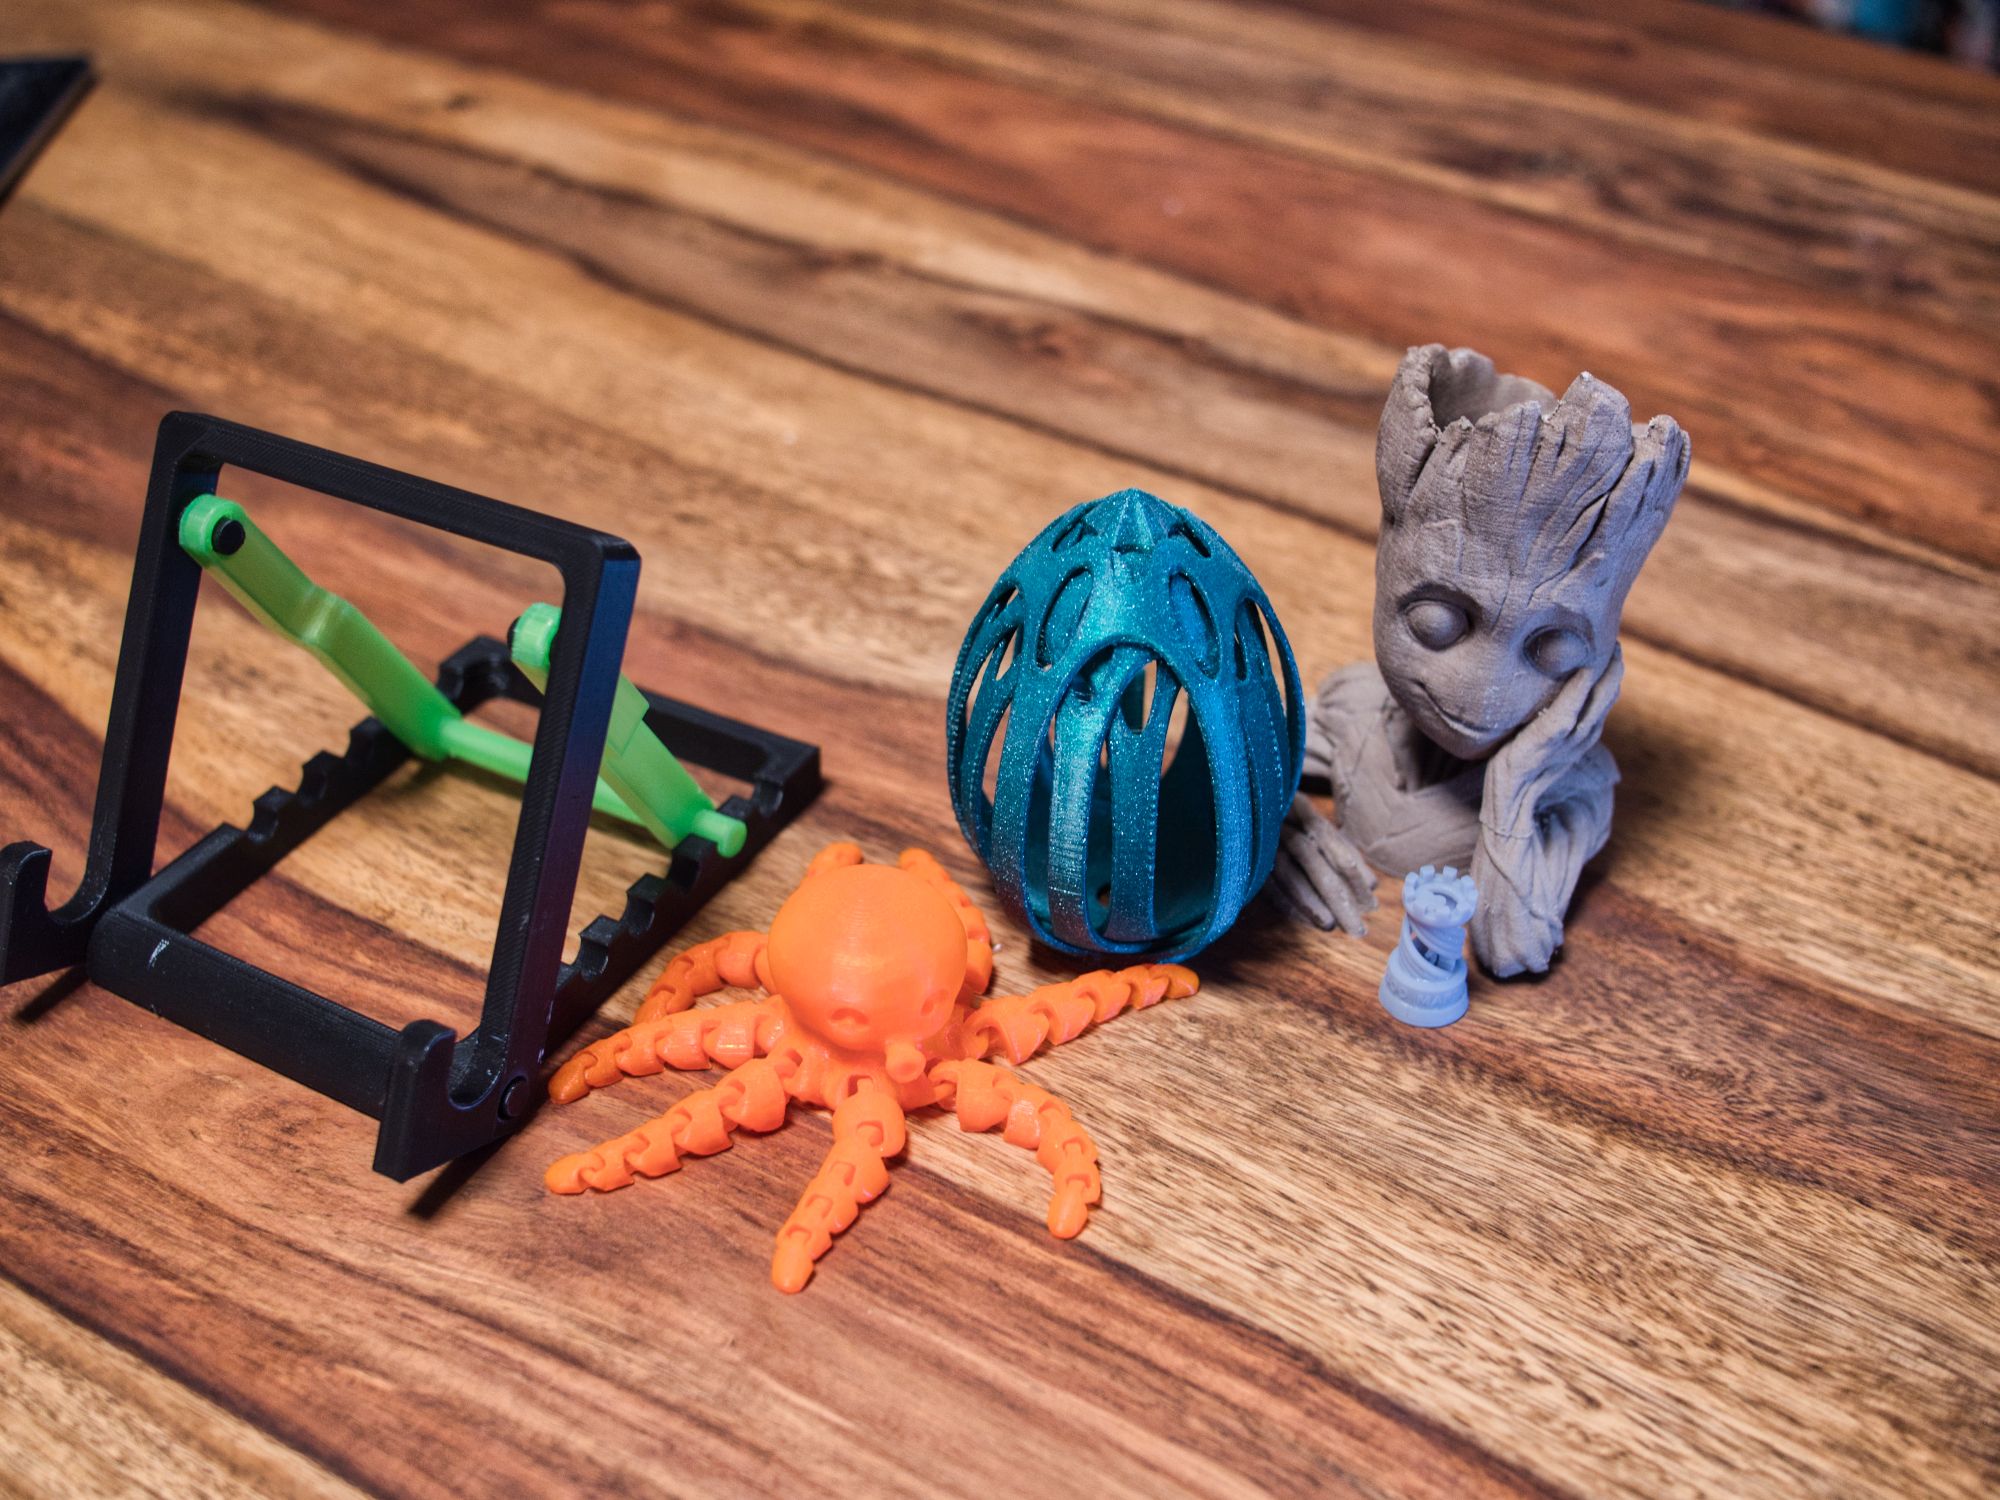
Post-Processing
Sometimes a printed 3D model comes out of the printer ready to use. But often you will want to do some some post-processing, like the following.
- Removing support structures, unwanted strings or slightly displaced material.
- Sanding the model so it doesn't have sharp edges and gets a smooth surface. Sanding can be as simple as giving it a few strokes with some sanding paper or as complicated as doing many rounds of sanding with different grains, dry or wet, and finally polishing the surface.
- Coating is another possibility to improve the look and feel of the printed piece. There are, for example, resins meant for coating 3D printed models. This step can reduce the need for sanding and improve other characteristics of your material.
- Painting the model can give it an awesome look. If you put in the time to prepare, apply appropriate primer and finally paint it, you get really nice looking 3D objects. Look for information on how to paint 3D models online.
Have fun :)
Well, here we go. This is the entire workflow of 3D printing. From acquiring a 3D model to holding a finished painted object in your hands. I hope this information can be useful for someone. I realize that you probably won't be able to finish your first print just with this article, but my goal was to at least provide an overview of what phases are involved, so you can use it as a starting point to look for more details.
Are you missing anything important in this article or would you like more information about something? Let me know on Twitter.
Happy printing!